
VIKING 110 SERVICE BULLETINS
***PLEASE NOTE: THE REMOVAL OF ANY GEARBOX REQUIRES A NEW CENTERING BUSHING, EVERY TIME***
The Viking 110 Installation and Operations Manual can be found HERE
The video is to be used in conjunction with the listed Service Bulletins below
Viking 110 mandatory flywheel upgrade
All Viking 110 engines with aluminum flywheels (gold anodized or aluminum colored) should be replaced with the latest steel flywheel.
Gearbox Oil Supply Inspection (Only Applicable to Gearboxes that use pressurized engine oil for lubrication) - Maintenance
On every yearly condition inspection, disconnect the oil pressure feed hose from the gearbox and place it in an empty plastic water bottle. Secure the bottle and run the engine for 15 seconds, while observing the bottle. If the oil restrictor at the engine side of the hose is unobstructed you should get approx.. a half bottles worth.
The important thing is not the exact amount, but rather that you have the same amount on every inspection to detect the possibility of a partially plugged/clogged oil restrictor.
Stainless Steel Engine Mounts
Add washers to all bases for additional strength as shown in the pictures below.


VIKING 110 MANDATORY IDLER PULLEY UPGRADE
Be sure the alternator belt idler pulley on the Viking 110 is made from steel. Test it with a magnet. The original aluminum pulley with “Viking Aircraft Engines engraved should not be used.” The upgraded pulley is available from Viking. Can be purchased here: Amazon.com: Gates 36026 DriveAlign Belt Drive Idler/Tensioner Pulley : Automotive

Viking 110 input gear update
Some early 110 gearboxes have an input gear with more end play than later gearboxes. To inspect for this use one of the following methods.
Grab one propeller blade while viewing the drive coupler. Rotate the propeller back and forth to see if these parts move in/out of the gearbox.
Use a pry bar and gently pry the coupler towards and away from the gearbox.
You are looking for roughly 0.040 (slightly less than 1/16) of end play to have this “condition” The reason for the inspection is to prevent the drive coupling from physically hitting the back of the gearbox, so also inspect for scraping parts that might indicate such.
It can be inspected yearly, or sent to Viking for a gear replacement
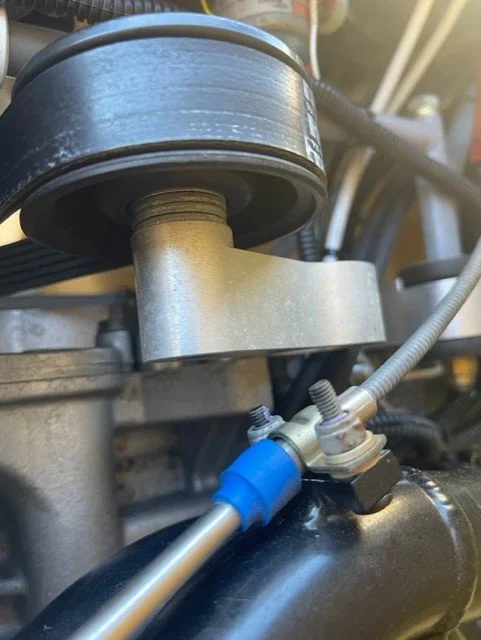
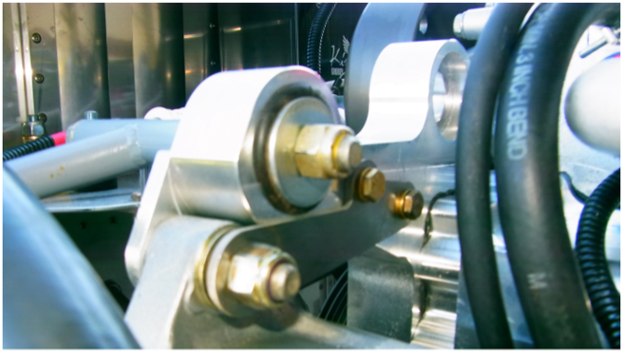
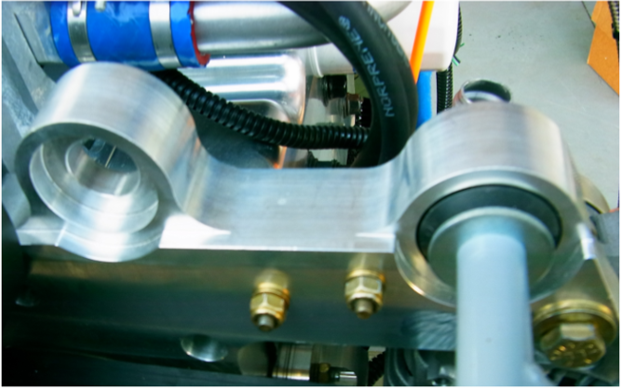
Viking 110 single ear alternator attach upgrade
There is an additional alternator support add-on bracket for Viking 110 engines equipped with a single top attach point. The additional bracket is available from Viking. Just bolt it to the original alternator top mount, center it on the machined housing, drill 2 holes and install AN-3 bolts of the correct length.
Viking 110 Coolant Hose Routing
If you have a Viking 110, where the coolant hoses are routed through the gearbox area and the flywheel, please ensure to route it in a different area. This will avoid something happening to the coolant lines, if something were to happen to the gearbox/prop strike so forth and vice versa.
Viking 110 OIL PICKUP HOSE

There has been an instance of the top mounted oil pickup tube fracturing and falling into the oil tank. Naturally, when this happens oil pressure is lost. Because all tanks were made the same way, and there has already been an update prior, to move the oil pickup to the bottom of the tank in order to increase suction, this now becomes and mandatory change. No Viking 110 Engines should fly with a top mounted oil pickup hose after 06/05/2018.

This picture shows the best oil pickup system for the Viking 110 engine. Some engines already have this but might use 1/2" hose, rather than a 5/8 hose and fittings. This particular engine can maintain 55-70 psi of oil pressure.

No 90 degree fittings if possible. 3/8 NPT threads. 5/8 hose barb. 5/8 hose rated for oil and suction.
Example of the best oil tank system: The oil pickup tube should be of the ridged teflon type so it can take the heat and not collapse under suction.


Viking 110 wiring upgrade
Change wiring to match the current wiring diagram for the Viking 130.
Remove ECU select switch in order to operate on a single computer only. Do this by locating the select switch on the panel, remove the three wires labeled; ECU 1, ECU 2 and SELECT. Disregard and tape the ECU 2 wire. Solder ECU 1 and SELECT together and protect with shrink tubing. If done correctly, the engine will start and run normally and the TAC (RPM) will be working.
The reason for this change is several instances of intermittent operation between ECU 1 and ECU 2 with zero failures of either one.

Locate these wires

Cap and solder as shown.
Viking 110 Valve Adjustment
Check Crankshaft Bolt Torque
“Check Crankshaft bolt torque. The bolts are visible outside the engine on the copilot side. Remove one bolt at a time, add the Right Stuff sealer to each side of the washer, reinstall and torque to 18 ftlb, then turn another 40 degrees” Repeat on all 10 bolts.”
